Brew it yourself No4
Next up in her homebrewing masterclass, Charlotte Cook asks the microscopic gods of fermentation to help her make magic happen.
Charlotte Cook
Saturday 27 June 2026

This article is from
British Summer Time
issue 132
Share this article
Fermentation has long fascinated humanity. Before we knew that little yeast cells were busily chomping through sugar to make alcohol people thought that fermentation was a gift from God. The alchemy of making intoxicating liquid from nothing could only be bequeathed from above, so divine were the results.
Nowadays our understanding of microbiology allows us to create almost any style of beer at home and invoking your deity of choice is entirely optional.
Which yeast do I use?
The question I get asked the most about home brew fermentation is what makes brewer’s yeast special and why its not interchangable with baker's yeast.
After all, both are deemed saccharomyces cerevisiae, indicating that they eat sugar, and are of the same species. They are, however, very different in how they behave and metabolise.
Baker’s yeast is selected to produce a lot of carbon dioxide quickly, so that the bread will rise rapidly, without too much flavour impact from the yeast. Brewer’s yeast, on the other hand, is selected to withstand a high level of alcohol and to produce certain flavours depending on the style of beer being made. If you try to make beer with the bread yeast in your cupboard you will end up with a bready-tasting liquid which has a lot of yeast still in suspension and will likely have you rushing to the loo (lots of yeast tends to upset even the strongest of tummies). Likewise, trying to make bread from brewer’s yeast will leave you with a pancake of dense and bitter bread. It’s much better to use the right yeast for the right application.
There are thousands of species of yeast, and more are constantly being discovered. They exist all around us, they assist in breaking down fruit and are often spread by flies and other insects as they buzz around. Every strain is genetically unique, and brewer’s yeast was the first organism to have its genome mapped back in 1996.
These genes determine how the beer will taste. If you want a wheat beer with a distinct clove taste, then a yeast with the POF+ gene will be needed. These yeasts can metabolise an acid found in malted barley into a phenol that makes beer taste like cloves. Similarly, if you want a beer that tastes of foam bananas then a yeast that produces high levels of the ester isoamyl acetate will be needed.
Luckily you don’t need to spend hours poring over the genetic fingerprints of yeast to know which one to use. Companies such as Fermentis, Pinnacle, Lallemand and White Labs (to name a few) have isolated strains to produce good examples of different styles. You can make a lager in the Czech, German or American traditions, as well as saison, English ale, or Belgian Trippel if you want. These are all available from homebrew shops, as well as Amazon, or specialist online retailers.
If you’re new to brewing, and don’t have temperature controls for your fermentation yet, then choosing a thermotolerant strain is a good way to get started. Many yeasts have a relatively narrow range of operation; lagers like it chilly, but most commercial brewing strains start to stutter when the fermentation temperature reaches about 28°C. Kveik yeast, originally a family of yeasts from the farmsteads of western Norway, can tolerate much higher temperatures, and will ferment even up to 40°C in some circumstances. These yeasts also ferment very quickly, so they’re excellent for beginners who might want to reap the rewards of homebrewing as soon as possible.
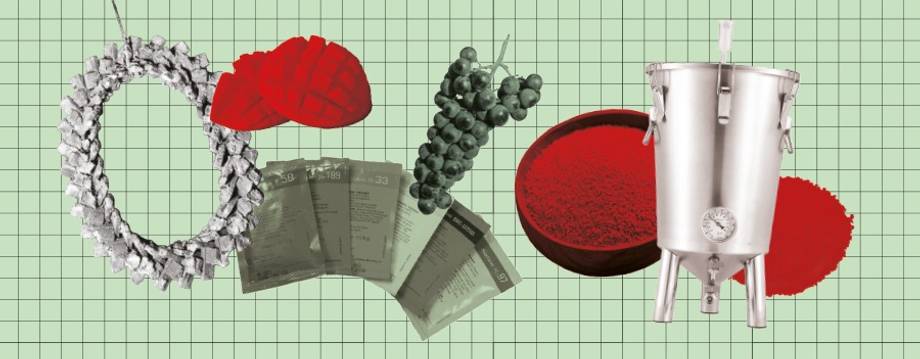
Once you’ve decided on your yeast, you need to get it into contact with your wort so it can begin to turn sugar into beer. There can be a lot of instructions on the packet, from oxygen dosing amounts to cell counts and alcohol tolerances. When you’re starting to home brew you don’t need to worry too much about this beyond getting the right amount of the right strain of yeast into the wort to give you beer at the end.
How do I prepare?
It might sound obvious but make sure you have the right yeast. Most yeast companies package their dried yeast into identical packets, and you need to check the name before 'pitching', simply meaning adding yeast to wort. This even happens to commercial brewers; I’ve gone to check on the fermentation of 5000 litres of IPA before, only to be hit with the distinctive banana aroma of a wheat beer. Delightful, but not what we were supposed to make.
Dosing the right amount is also critical; too little and you’ll have a sluggish fermentation with off-flavours. When you get more advanced then thinking about pitching rate in relation to yeast character, ester, and higher alcohol formation might come into play, but for now simple is fine. The packet ought to have suggestions for the weight of yeast to pitch into the volume of wort, and when you’re starting to brew, this is good enough.
Here cleanliness is critical, and you’ll want to make sure your fermentation vessel, any hoses you’re using to transfer the wort from the kettle to the fermenter, and anything you use to stir the wort are cleaned well with Campden tablets and homebrew sanitiser. Wort is an environment in which unwanted wild yeast or bacteria will thrive, as it contains a lot of sugar and a safe place for these beasties to grow with abandon. One of the important functions of adding brewer’s yeast as soon as you can is to encourage the yeast to out-compete other organisms and make the environment hostile to the invaders. Fermentation produces carbon dioxide, ethanol, and drops the pH of the wort, making it harder for infections to take hold. This environment is also hostile to the yeast; they will find it harder to keep fermenting and you’ll see a distinct slowing down of activity as the fermentation reaches its end.
How do I monitor my fermentation?
This will all depend on the yeast strain you’re using. Lagers prefer a colder temperature and so a garage or shed is a good place to leave them. Kviek will happily bubble away wherever you leave it. For very cold environments, heated belts can be placed around the fermenter to keep it warm.
Knowing when your fermentation has finished can be done a number of ways. You can simply just wait until it stops bubbling, or at least until it doesn’t bubble so much. The yeast will naturally drop out of solution in a process known as flocculation. The airlock will glug less, the fermentation vessel will cool down, and you will see the yeast begin to settle to the bottom of your fermenter, leaving a thick sludge of brown residue. Usually this means there will be no more yeast activity, and you've successfully turned your wort into beer.
You can also check if fermentation is complete by using a saccharometer to take a gravity reading (check how much sugar is in the wort) but we'll cover that at a later date. When getting started, just visually checking will be enough.
What do I do when it finishes?
Once your beer is fermented, it needs to be matured. During this process the yeast will drop out of solution and the flavour of your beer comes together. Yeast tends to be bitter tasting, and old, tired yeast cells will die and spill their insides into your carefully crafted brew. This is why some homebrew tastes like marmite (marmite is made from dead yeast cells), and while this might be lovely on your toast it’s considered an off flavour in beer. To successfully mature your beer, it’s best to separate it from the yeast. This is done by carefully syphoning off the beer into a fresh, clean, fermentation vessel, leaving behind the majority of yeast cells that might cause you trouble. The beer should then be stored in the coldest spot in the house, often a garage or airing cupboard, for at least a few days to allow the last cells to drop out. The beer is now ready to drink. Check out future features for tips on how to brew a perfectly sparkling pint at home.
Share this article
You’ve reached your limit of 5 free articles this month.
Unlock unlimited access and more
Join Beer52 and get your first month half price
-
Get your first box for £13.50 (RRP £27).
-
8 beers & 2 snacks delivered monthly.
-
Printed Ferment magazine included.
-
Unlimited access to all online content.
