Brew it yourself No7
This month, Charlotte Cook explains how to get your precious finished homebrew into bottles, casks or kegs.
Charlotte Cook
Saturday 14 November 2026

This article is from
Global Brews
issue 137
Share this article
Now that you’ve made some delicious beer, you’re probably keen to share it with all the beer lovers in your life. If inviting them all round to sample straight from the fermenter doesn’t sound appealing, you’re going to have to get your beer into some sort of package, usually a bottle, cask, or a keg.
The first stage is racking. This is done once fermentation is complete and is the process of syphoning off the beer from the sludgy residue of dead yeast, protein, and spent hops that accumulate at the bottom of the fermenter. Not doing this will leave your beer hazy, and well as potentially tasting like Marmite, as the divisive spread gets its unique flavour from autolysed brewer’s yeast. Racking is best done using a specialised homebrewing syphon, which can be hand pumped rather than relying on mouth suction to start the flow. This is good from both a safety and a sanitisation standpoint: it is no fun to end up with a mouth full of sanitising fluid, and after all that hard work keeping everything clean, to mess it up at the last step would be pretty heartbreaking.
Bottled beer
If you’re bottling, it’s best to syphon your beer into a specialised bottling bucket. These look very similar to homebrew buckets, but they have a small manual tap on the side, which can be used to fill bottles directly, or in combination with a bottle filler wand, which will give more consistent fill levels.
If you want your beer to be fizzy, there is one last stage before bottling, which is known as ‘priming’. This is where you add an amount of sugar to the beer, for the residual yeast that’s still floating around to consume, turn into carbon dioxide, and carbonate the liquid in the bottle. This is known as bottle conditioning and is successfully used by professional brewers the world over, and is a particularly popular method in Belgium.
Priming sugar is often just table sugar, dextrose powder, or powdered malt extract, but you need something that will dissolve well into the beer and give you a homogenous liquid that carbonates uniformly.
How much sugar you need depends on the style of beer you’re bottling, the temperature of the beer and the amount you’re packaging. Luckily there are calculators for this kind of thing on the Brewer’s Friend website, which take much of the guesswork out. You may also need to add a little bit of bottle conditioning yeast, such as CBC-1 from Lallemand, especially if your beer is unusually strong or has been maturing for a long time. Yeast cells will eventually die or become too stressed by alcohol or sugar levels to continue fermenting, and if this is the case a little bit of extra yeast will ferment the sugar and leave you with a nicely fizzy beer. Once, the advice was to use champagne yeast for this, as it tolerates stress conditions well, but some (particularly experimental) strains can also possess a gene (making them POF+) that means they produce phenols as they ferment (much like a German wheat beer) which can change the flavour profile, usually not for the better.
Once you have a homogenised beer with any sugar or yeast added, you need to get it into bottles. The best bottles to use are the kind you need to open with a bottle opener, and you can buy these online or from a homebrew shop. They can be re-used so long as they’re clean and sanitised, and you can even use a motley crew of bottles rescued from your recycling bin to be cleaned and pressed into service. You’ll also need crown caps and a capper; the first capper that homebrewers tend to use is the two-handed wing style, but a small investment in a benchtop model with a long handle will pay off in the long term.
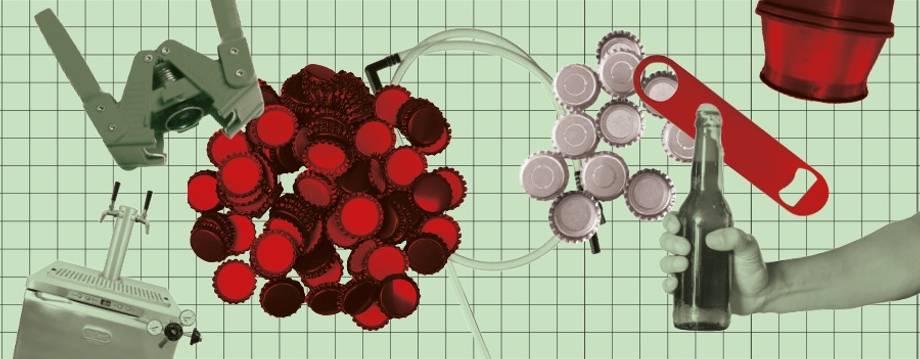
Filling can be done straight from the tap. Ensure you have cleaned it thoroughly and have some vodka in a spray bottle to give a top-up of sanitisation after you close the tap and before you open it each time. It can be hard to judge how much beer is going in using this method, and you’ll likely end up with a range of fill-levels and thus carbonation levels. Using a filler stick (also known as a filler wand) can make this much easier and also reduces the amount of oxygen going into the bottle, meaning your brew will stay fresh for longer. These sticks work with a valve, either one you manipulate by hand, or a spring loaded one you control by pressing the wand tip on the bottom of the bottle. The beer flows out in a controlled way, and you can get much more consistent fill levels. A good way to practice is to run sanitising fluid from the bottling bucket through the wand, then you get to understand how the kit works, as well as cleaning the wand inside.
Aim for a fill level about 1/3 of the way up the neck of the bottle, this means there’s enough space in the bottle for the CO2 produced by the bottle conditioning, avoiding the age old trope of exploding homebrew bottles in the airing cupboard. Once capped, the bottles will need to be kept warm, ideally at room temperature, for at least two weeks until the conditioning is over. Then they’re ready to pop into the fridge and enjoy the cold and fizzy fruits of your labour.
Cask beer
Storing the beer in a cask is also an option, and homebrew shops sell pressure barrels, which are essentially sealed and pressure-rated versions of the bottling bucket. They look like a plastic cask with a tap on the side with a screw-on cap on the top. These allow you to store the beer in a relatively stable way, until it is carbonated and ready to serve. The downside of these barrels is that the beer needs to be drunk quickly, much like a traditional cask, and unless you have a CO2 injection cap, air will get into the barrel from the first pour. If you have a party, or feel confident you can polish off 40 pints in a week, this doesn’t present a problem. But, for the slower drinker, investing in the bottling set-up might be preferable.
The process is remarkably similar to bottling; simply rack the beer into the barrel, dose with priming sugar and yeast, and let it condition for two weeks. You might need to crack the cap on the top to let off pressure if it builds up too much. This is a really simple, cheap way to get your first homebrew batch in a drinkable position, and a good way to test if your processes and recipe are where you want them before settling on the more faffy bottling route. The pressure barrels can be re-used as long as they are cleaned properly, but they do let UV light in, so keeping them in a dark environment during conditioning and storage is essential for the quality of your beer.
Keg beer
For the truly ambitious, it is possible to keg your beer and serve it through a tap, just like at the pub, and this is guaranteed to really impress your friends/dates/whoever you tell. However, this approach requires the use of carbon dioxide in pressurised cannisters and a much more professional set up with regulators and lines. These also require additional safety measures, so for a beginner I would recommend sticking to bottles or a pressure barrel. Should your homebrewing develop and you want to go into kegging, there are homebrew kegs on the market, and a friendly local publican or cellar tech will be able to give you the necessary safety information. The Malt Miller sells kegerator kits that work with a Soda Stream CO2 bottle, and these are much safer than the industrial cylinders.
Bottling beer sounds harder than it is, and much like any other part of homebrewing your success really relies on being prepared, having everything clean and sanitised before you start, and ensuring you keep on top of hygiene as you go. With some patience you’ll soon have great tasting, fizzy beer to share after a few weeks, and soon you’ll be ready for batch two.
Share this article
You’ve reached your limit of 5 free articles this month.
Unlock unlimited access and more

Join Beer52 and get your first month half price
-
Get your first box for £13.50 (RRP £27).
-
8 beers & 2 snacks delivered monthly.
-
Printed Ferment magazine included.
-
Unlimited access to all online content.